
Pieter Rijlaarsdam
Read all my blogsUsing webservices and document templates to generate output
Pieter Rijlaarsdam, 23 May 2012
 In SAP CRM 7.0, it is possible to define document templates. Document templates can be used to generate preformatted and predefined documents using Microsoft Word, or Adobe Reader.
Using this functionality is very easy. Implementing is as well… once you know how.
Let’s take a look…
How does it work?

In many business objects, there is an assignment block for attachments. Here, users can attach documents or links to documents to the business objects. Business objects can for instance be activities, opportunities, leads, but also marketing campaigns, business partners of contact persons…
In this assignment block, there is also a button ‘With Template’. This button is usually greyed out, unless you have defined document templates.
 If you have created document templates in your system, the button will be clickable, and clicking the button will open a popup where the user can select one of the available templates. Selecting the template will merge the data from the object (i.e. the activity, opportunity or account) with the template (either a PDF or an MS Word template).
Prerequisites
Adobe:
- Adobe reader for end users
- Adobe LiveCycle Designer for designers
MS Word:
- Microsoft Office, preferably 2007 or higher.
SAP CRM:
- SAP CRM 5.1 SP04 or higher
Settings:
- crm_oi in SICF in SAP CRM should be active
- ActiveX should be switched on for the SAP CRM server on all end user machines.
Creating document templates
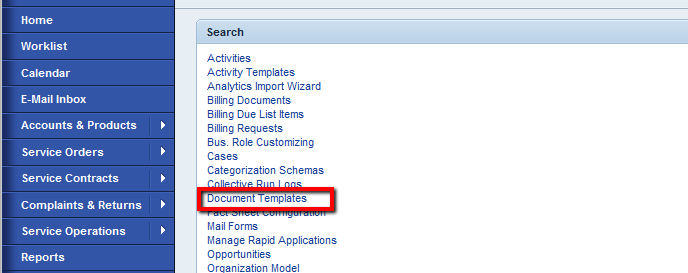 Document templates are available in the service professional business role, but can of course also be customized into your own role. To create a document template, in the menu, click on the logical link ‘Document Templates’.
In the search screen, hit the ‘New’ button.

In the field File type, select MS Word of PDF.
I would recommend to use PDF if you are sure the generated document will not require editing afterwards.
I would recommend to use MS Word if the document does require (or allow) to be edited afterwards. Of course, a PDF document looks nicer.
Give the template an ID and a proper name. In the field Object Type, select the object you would like to be able to select your template in. Logical options here would be for instance ‘business partner’ (BUS1006) or activity (BUS2000126), or opportunity (BUS2000115).
In the field webservice, you select the webservice that takes care of the data retrieval from the SAP CRM system. If you have not created one yet, check the next chapter. If you have created one, but you don’t see it here, check if it has been set to ‘productive’ properly in the webservice screen.
Depending on the choice for MS Word or PDF, you will have the options to download the schema and start the designer (Adobe LiveCycle Designer in cas of PDF and MS Word in case of MS Word).
Downloading the schema will download an XSD to your local machine, which you will need later to set the link between the document template and the webservice.
Now the editor (Adobe LCD or MS Word) should be opened directly from SAP. If this is not the case, check the versions and see if all needed components are installed properly.
Creating a webservice to populate the fields
If you have not yet created a webservice, or you need a field that is not currently available in the webservices available to you, you should create a new one. In SAP CRM 7.0 EhP1, it is not possible to make changes to an existing webservice using the webservice functionality in the webclient.
 To create a new webservice, go to the option Webservices in the navigation bar. This option is available standard in the Service Professional business role in work center Service Operations, but can of course also be added to your own business role if needed.
In the search screen, click <new> to create a new webservice.
 Enter a name and a description. In business object, component and root object, select the relevant business object, depending on on which object you would like the document template to be available (i.e. business partner, activity of opportunity).
Select the Read checkbox. We don’t need to create or change the business object from our template.
Click <next> to go to the second step. In the second step, select the relevant fields from the BOL. This can be quite complex. Make sure you do this step right, because if you have missed a field, you can not add it afterwards, as it is not possible to update a generated webservice afterwards, so you will have to do it all over again. I recommend to use the BOL browser to check the correct path to certain attributes before finishing the webservice wizard. Especially partners connected to a business transaction, or activity reasons for instance can be hard to find.

Click <next> to go to the third step. Here, you can tick the ‘exclude’ option to make fields read-only, but as we did not tick the create or change options in the first step, we can continue without change here.
Click <next> to go to the last step in the chain. Here, you should save, activate and set the webservice to ‘Productive’ If you forget this last step, you will not be able to use it in the document template.
Editing the document in Adobe LiveCycle Designer
Once you have opened the Adobe LiveCycle Designer, an empty form is shown. The fields you have selected in your webservice are not yet available, because there is no link between the XSD and the form yet.
To add the fields to the form, select File –> New Data Connection.
Select XML schema in the popup.
 Select the XSD from the local machine.
  Select ‘Embed XML Schema.
You will now see all the fields are available in the data view tab on the left side of the screen.

You can add text to the form by adding a text object from the Object Library on the right side of the screen.

If you would drag a field from the left side into the form, it will appear as a field.

If you want to add a field inside the text, you should right-click in the test and select ‘floating field’.
This will add a text like {TextField}.

If you select this field, you will see that in the bottom-right corner you can edit the properties of the field. One of the properties is the binding. The binding is used to set the field to represent one of the fields from the webservice.

The result will be that the value of the field is incorporated in the text.

Editing the document in MS Word
Unlike in Adobe LC, where you can also start LC locally and process the document, when working with MS Word, it is important to open the editor from the CRM screen using the Start Editor button, because the Word document should be opened as template.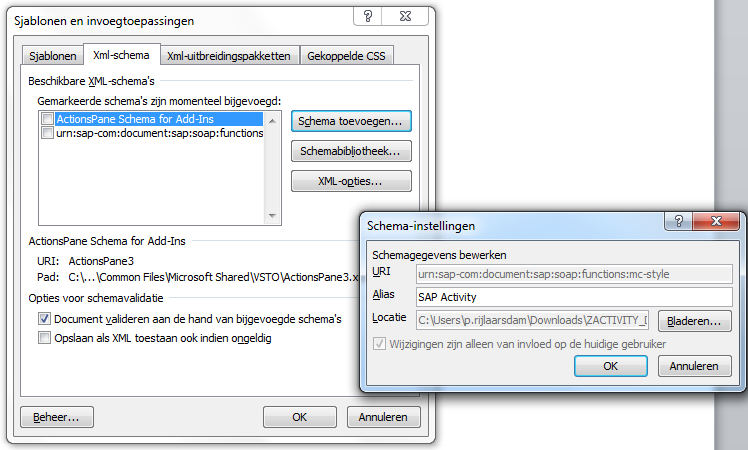
In MS Word, make sure the Developer tab has been switched on.
In the developer tab, click the button ‘Schema’. In the popup, click on ‘add schema…’
Now select the checkbox and click ‘OK’.
The selected XML strucure will now be available on the right side of the screen.
Clicking through the structure will add fields. For readability I would suggest to first open the structure until the actual object, and close it again at the end of the document.

Uploading to SAP CRM
After finishing the template, you can upload it into the previously created document template in SAP CRM.
If document templates have been applied to a business object, in the attachments assignment block, the ‘with template’ button will appear. If you click this button, you will be able to select the template you have created, which will merge the data from the object with the template.
Receive our weekly blog by email?
Subscribe here:


4 responses to “Using webservices and document templates to generate output”
Hi Pieter.
Nice article. The documents template are a nice feature but depending on the complexity of the requirements, i won't advise to use it if for example if in your document you want to use "if" conditions.
It can quickly become a nightmare. So better use only for simple documents.
Regards,
Helder
I definately agree. For more complex output, or structural output, actions int transaction would definately be better.
Document templates are nice for quick mailmerge or for instance summaries.
For instance address formatting can be much more difficult then when for instance using good old smartforms.
Thanks Helder 🙂
Hello,
how can I edit the font size, style and the color of XML items in the MS Word case?
Hello,
You can edit these fields by putting a space at the lowest level XML item. You then apply the font style you want to that space and it will then auto populate using the new formatting.
Kind Regards,
Tom