
Rudgiger Toikromo
Read all my blogsIn one of our earlier blogs (http://blog.acorel.nl/2014/07/additional-levels-in-multi-level.html), my colleague Emiel Truijen wrote about how to add additional levels in Multilevel categorization. In this blog I will explain the specific steps to setup Multilevel categorization for Complaints and how to maintain the categories.
There are 2 important steps in order to create the Multilevel categorization.
1. Customize Multilevel Categorization in GUI
a. Define Application Areas for Categories
IMG: Customer Relationship Management -> CRM Cross-Application Components -> Multilevel Categorization -> Define Application Areas for Categories
In this step we need the following default SAP settings:
- Application: COMPLAINT
- Application Area: Complaint
- Parameter: SUBJECT_PROFILE
- Class/Interface: CL_CRM_ERMS_CATEGO_VA_1ORDER
b. Define Subject profile
IMG: Customer Relationship Management -> Transactions -> Settings for Complaints -> Settings for Subjects -> Define Subject Profiles
In this step we will create Subject Profile ‘YCOMP’ with Subject Profile Category ‘A’

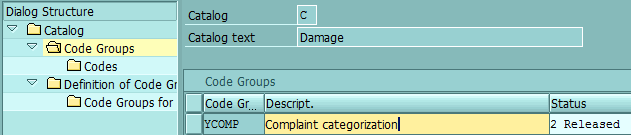
c. Define Code Group Profiles
IMG: Customer Relationship Management -> Transactions -> Settings for Complaints -> Settings for Subjects -> Define Code Group Profiles
In this step we will create the Code Group Profile ‘YCOMP’ with Catalog ‘C’ and status ‘Released’
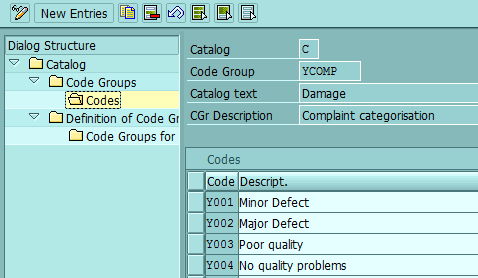
d. Define Code Groups and Codes for Catalogs
IMG: Customer Relationship Management -> Transactions -> Settings for Complaints -> Settings for Subjects -> Define Code Groups and Codes for Catalogs
In this step we will create the different Codes in Code Group ‘YCOMP’ for the categorization of the Complaints.
We have finished all the settings in the SAP GUI. We will now continue with the settings in the WEB UI
2. Maintain the Multilevel Categorization in WEB UI
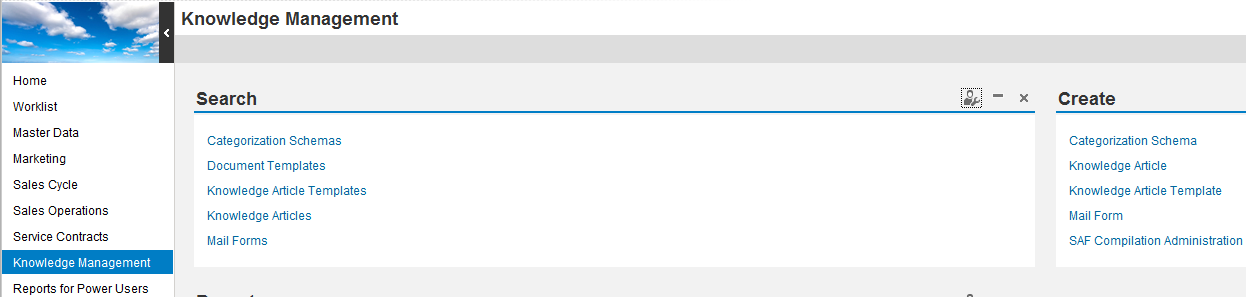
a. POWERUSER
Make sure to logon in the WEB UI with the business role POWERUSER that has the work center IC-MGRKM (Knowledge management) maintained
b. Select Knowledge management –> Create Categorization Schema
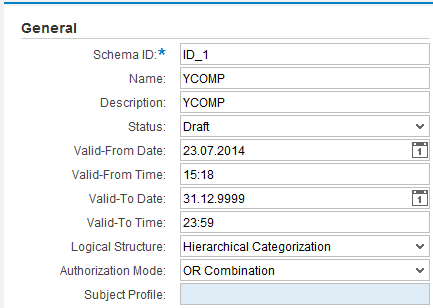
Create a new categorization scheme with ID, name and description.
The schema has the status ‘Draft’. We can now maintain the new categorization scheme
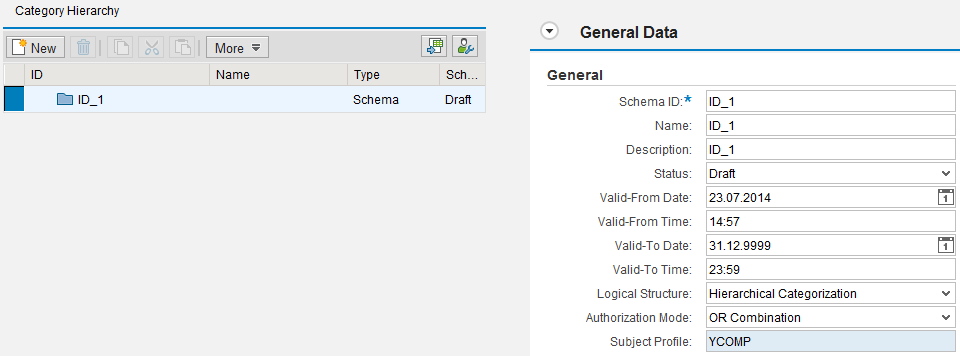
c. Assign the categorization schema to an application area
Add Application ID ‘Complaint’. The parameter Subject Profile will be determined automatically. Select the value ‘YCOMP’ which you have created in the GUI.

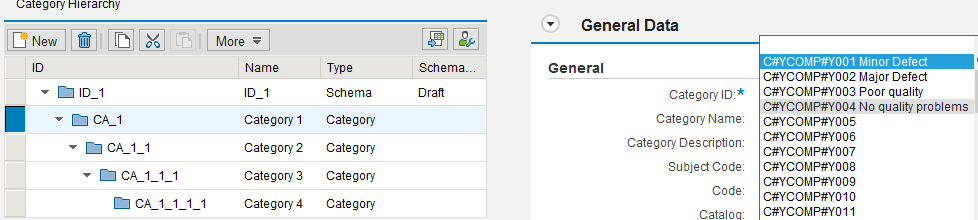
d. Add new categories in Category Hierarchy
In this example we have created 4 category levels

e. Select the valid Codes and link them to the specific Category
In step 1d we have created the Codes that we can now choose as Subject Code
f. Activate the new Categorization schema
Enter a Valid-From Date and Valid-From Time and change the status from ‘Draft’ in ‘Released’. The system will automatically fill in the current date +1. On that specific time and date the Categorization schema will be activated
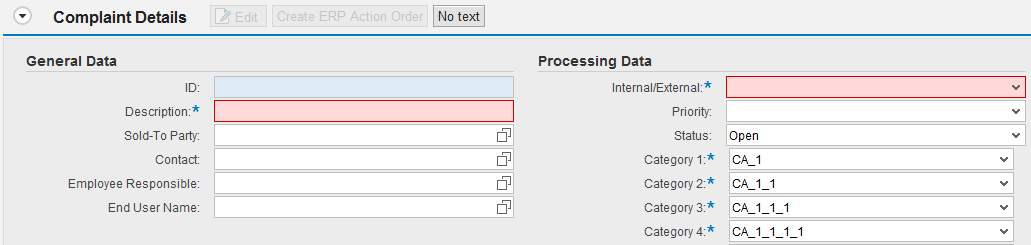
Et presto! You have created a Categorization schema which you can now use in a Complaint
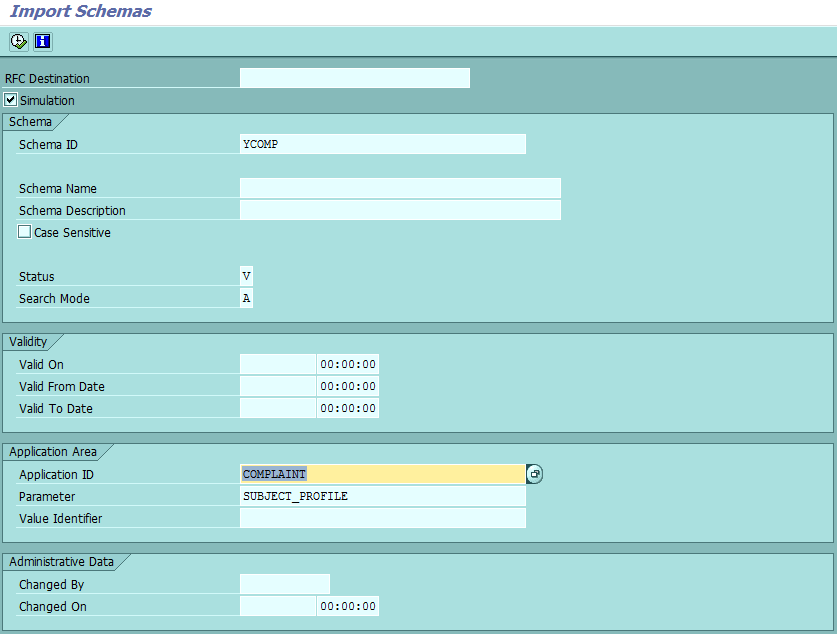
The final step is to import the Categorization schema from TST to PRD environment.
Start up the GUI and go to tcode SE38 and open program CRM_ERMS_CAT_AS_IMPORT
With this program you can import the categorization schema which you have created in the WEB UI
Good luck!!
Receive our weekly blog by email?
Subscribe here:


2 responses to “How-To setup Multi-level categorization”
In step e. Select the valid Codes and link them to the specific Category
Do you have any suggestion for the schema that have a lot of Hierarchy level?
I have around forty-thousand data in 4-level.
thank you and regards,
Champ
40.000?
I would suggest trying to build a custom migration program using functions CRM_ERMS_CAT_LN_UPDATE and CRM_ERMS_CAT_OB_UPDATE.
Not sure if this will work. You could also try programming using the GenIl. I don't think there is a bol object available to service this.
Regards,
Pieter