
Rianne Westgeest
Read all my blogs2021, we finally entered this fresh new year that we’ve all been looking forward to. If 2020 was a Friends Episode, it would have been called “the one with the challenges”. Last year asked from us to be flexible and forced us to think in unusual ways. Especially in e-commerce, which seems more relevant than ever now lots of entrepreneurs had to shift their business from offline activities to mainly online ventures. New features needed to be released on a very short term. Home delivery of almost everything, home education tools, new online meeting facilities; just a few examples of services that grew in importance to our everyday lives and therefore evolved fast. And then we realize: during challenging times we gain lots of new skills and knowledge. Today, we can look back at our lessons learned and start this new year, in which we can hopefully leave the pandemic behind but keep innovating in the same pace as we did last year.
While innovating, it is helpful (if not essential) to use the right -technical- tools. For content managers for example, a flexible system that enables you to independently manage your content in a quick and easy way, can help to simplify the hassle of rapid adaption to change. Therefore, in this article I will dive further into the personalization options of SmartEdit which can be seen as such a tool. SmartEdit is the user-friendly CMS system of SAP Commerce and enables to create and maintain pages and components in an intuitive and visual way. Already in 2018 my colleague Mark Kilsdonk gave a short introduction to the working of SmartEdit in this very interesting read. Now, in 2021, I would like to complement this introduction and give more insights in SmartEdit’s personalization options. Building a customized user experience for your customer is known for leading to better engagement and higher conversion rates. Spotted as one of the biggest e-commerce trends in 2020, personalization will continue to grow in relevance in 2021 even more.
When talking about personalization in e-commerce, the goal is to create an inspiring, relevant experience tailor-made for your customer. This customized experience consists for example of personal offers, product recommendations, relevant search results and is based on a user profile composed with available data such as previous clicks, purchase history and personal characteristics. To divide your customers in relevant target groups in order to present them such an environment, you need to collect and analyze enough data to gain insight about who your customers really are, their behavior and what they need and expect. This way you can segmentize your customers into real valuable groups to present your content to. In order to retrieve and collect this data you can use for example SAP Marketing Cloud and the relatively new solution from SAP, SAP Context Driven Services, which enables you to create target groups with the help of the click-behavior of your visitors. Both of those services integrate seamless with SAP Commerce. I will not dive into this segmentation any deeper for now, but if you are interested in how SAP Commerce integrates with other SAP solutions, this could be an interesting webinar to watch.
When you talk about personalization for SAP Commerce you can think about:
– Personalized search results
– Personalized categories
– Personalized promotions
– Personalized banner and information
– Personalized product carousel.
Note that not all of those commerce personalization options are configured stand-alone in SmartEdit. For example, the personalized search and categories are configured in the Advanced Search Cockpit, while personalized promotions can be set via the Promotions Engine at the Backoffice of SAP Commerce.
How to: Personalization in SmartEdit
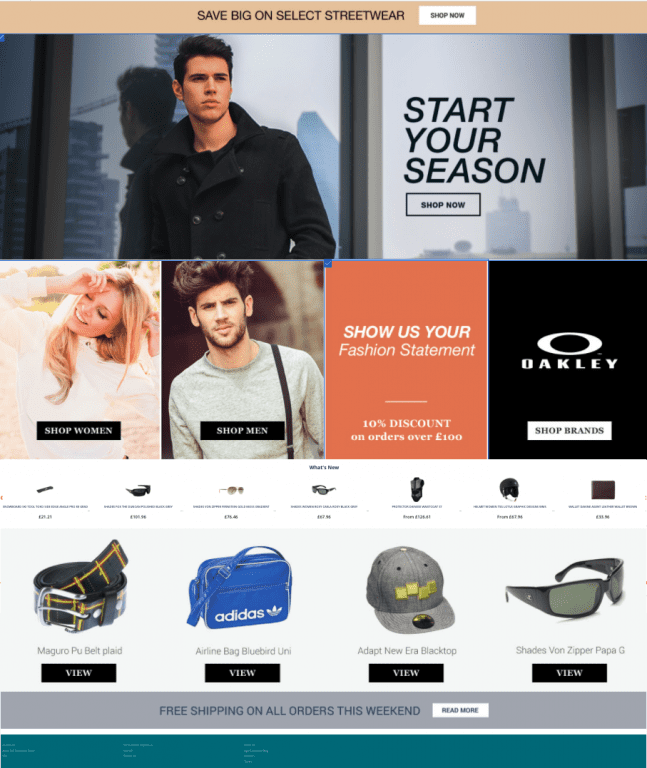
So how does personalization look specifically in SmartEdit? Let’s say we have an online apparel store with a broad selection of apparel. The homepage shows a variety of all products offered and attempt to attract both woman and men. It looks like this:
Now, we would like to display a different homepage, only to female customers in their twenties that have an interest in winter products, at the start of the winter season. This way we want to create a personal experience for this specific group of customers. Let’s say that we collected loads of data over the past few years concerning the visitors of this hypothetical online apparel store. We gained a few conclusions/key insights from this data. First of all, we found a high interest to a few brands for this target group. Secondly, we discovered a range of products that are frequently sold to female customers aged 20-29 with an interest in winter sport. Last but not least, we found that a banner with a model of the same age and gender as the target group leads to increasing sales and a better connection to our apparel platform.
Based on those insights we came to the following goals:
– We would like to present our target group a personalised banner
– We would like to present the range of products that are frequently sold to this group in a product carousel
– In addition, we would like to boost search results for the top ten brands sold to this target group
Step 1. Enter personalization mode of the page
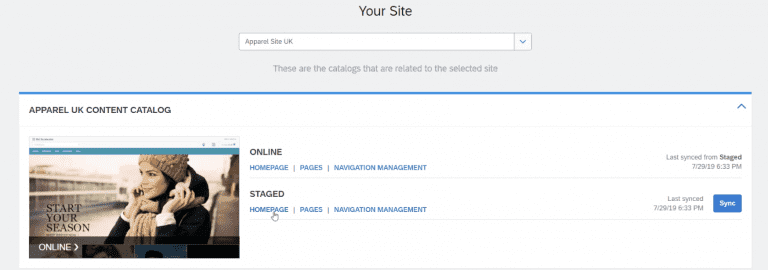
To create this tailor-made homepage, we have to log in in SmartEdit and select the site we would like to customize for our target group. Then, we go to the homepage (since this is the page we would like to edit) in the staged library.
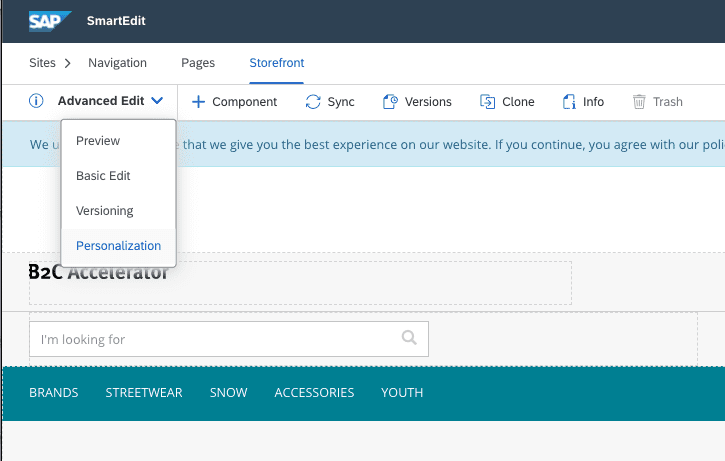
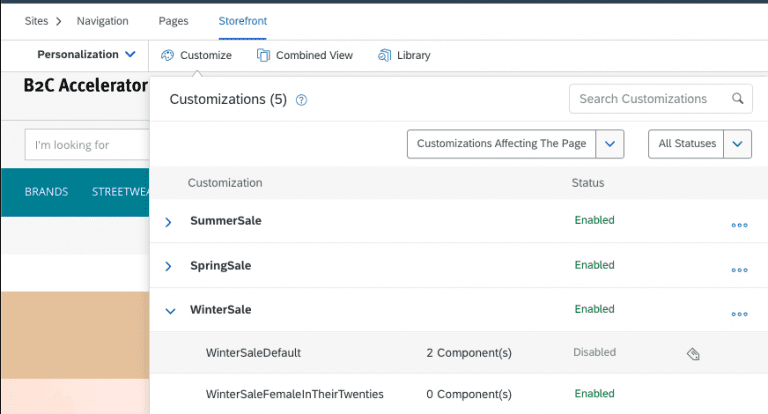
To create a customization, go the the personalization mode as demonstrated in the image below.
Step 2: Create a customization and specify target group
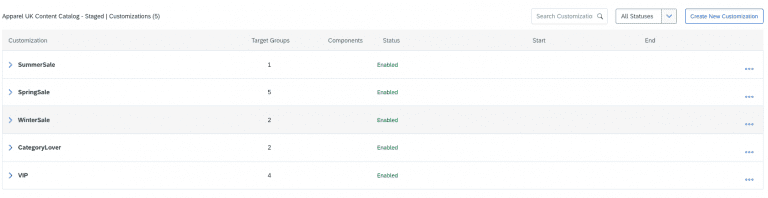
From there, you can access the customization editor. You can see all available customizations and create a new one if desired. A customization is basically a variation of the page, only for visitors of the site that meet the requirements as specified for the connected target group.
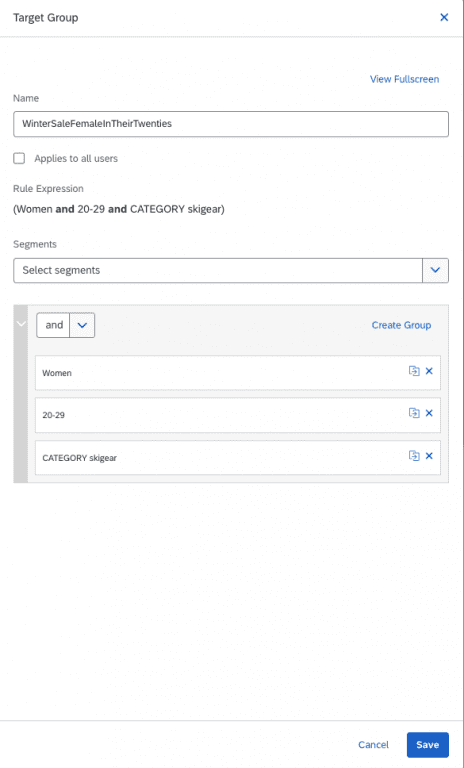
In this example, we would like to create a customization for the scenario as described above, so we use the already existing customization WinterSale and define a new target group over there: “WinterSaleFemaleInTheirTwenties”. We can achieve this by clicking on the three dots right at the row for WinterSale and choose ‘edit’. Then go to tab ‘target group’. You will enter the editor as displayed in the image below. A target group can hold several segments. A segment on its turn can be defined as a customer group selected for a specific business purpose and share common characteristics such as gender, age or habits. In this case: women, age 20-29, interest in ski gear.
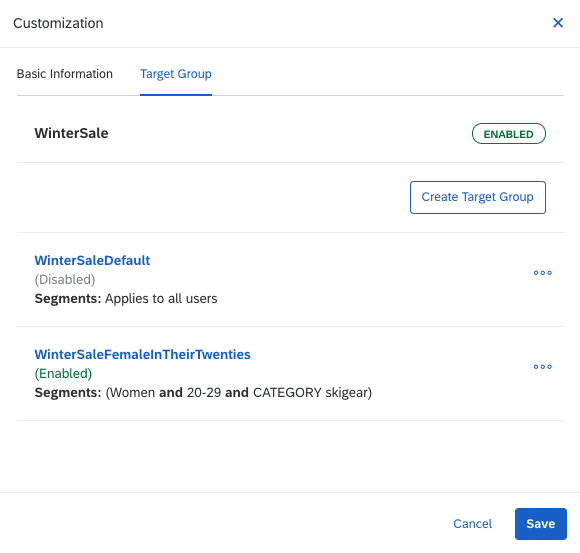
Customization WinterSale now has two targetgroups connected: WinterSalesDefault, which applies to all users, and WinterSaleFemaleInTheirTwenties, which only applies to Woman aged 20-29 with an interest for ski gear.
Now, when we go back to Personalisation mode in SmartEdit, we can select the customization with the newly created target group, and start customizing the homepage.
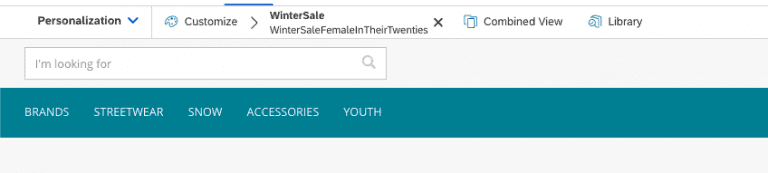
Make sure you are editing the customization for the right target group: the name of the customization and the right target group should be displayed next to the ‘Customize’ button (see below).
Step 3: Personalize the content of components
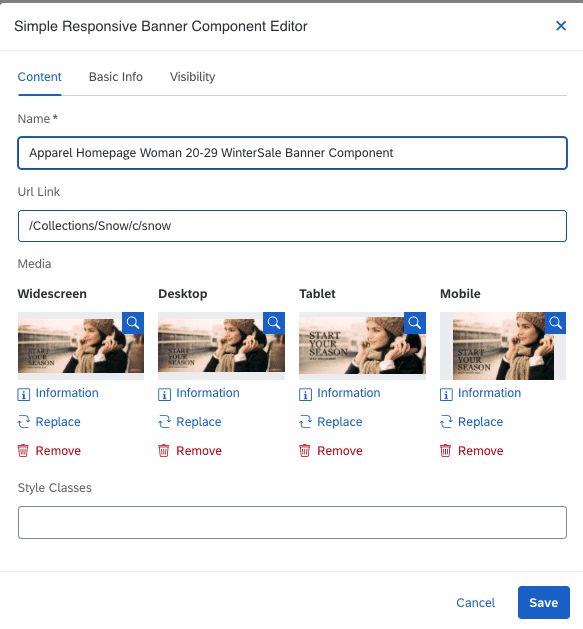
First of all, we would like to edit the banner of the homepage. Click on the pen icon of the banner component to enter the Simple Responsive Banner Component Editor of the banner we want to modify. We change the picture with an image the target group can identify themselves with: a female model wearing an item from the winter collection. We modify the link of this banner to redirect to the winter collection, in this case Collections/Snow/c/snow.
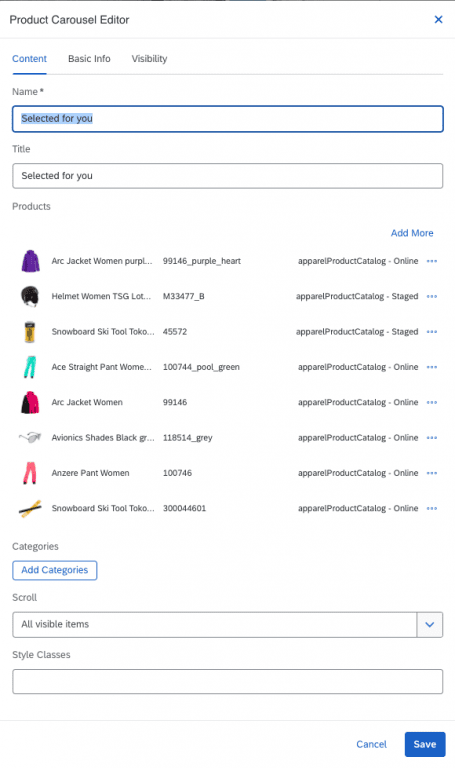
Secondly, we change the products in the product carousel to items that are proven to be relevant to our target group. We first enter the edit mode by clicking the pen icon in the upper left corner of the product carousel we would like to edit.
Step 4: Set date range to your customization (optional)
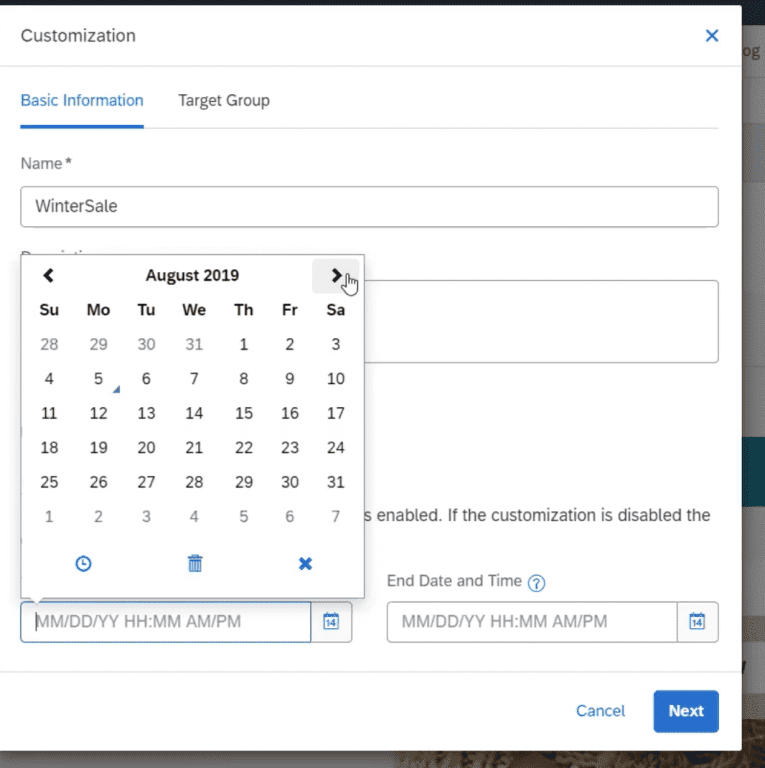
Since this customization is seasonal, we also select the period of time we would like our homepage to appear to our target group, instead of the general homepage. To do so, we go back to the customization editor, and set a start date and an end date for our customization.
Now, our homepage looks like this, just for the defined target group over the period of time set in the customization editor above:
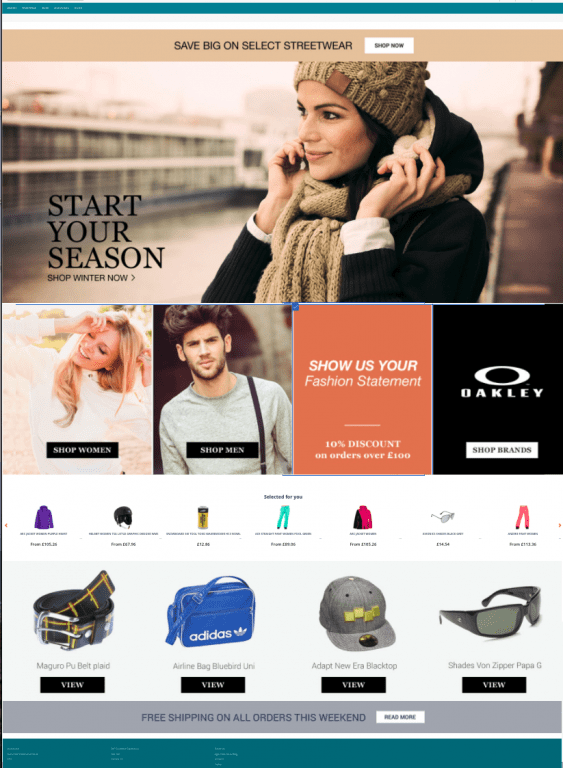
You can imagine, since you can modify all components independently and for different customizations, it could be a next step to modify even more components of the homepage with relevant content for multiple target groups, and different seasons. This way you can serve a more personal experience.
Step 5: Add search profile to boost search results for target group
Now, there is just one thing left. We would like to boost search results for brands relevant for the woman in our target group. As mentioned earlier, this is not a stand-alone feature from SmartEdit. We first need a search profile for our target group in the backoffice of SAP Commerce. I will not explain this in-depth, but if you want more insights in creating search profiles in the backoffice, I can recommend this blogpost. Given there is a search profile that boosts the top ten brands for our target group, we need to connect this profile to the homepage in SmartEdit as follow. Go to the Manage Customization Library and select the customization and target group. Then, under options (three dots) select Commerce Customization and select the right search profile:

You can add promotions to your customization the same way by selecting “Promotions” instead of “Search” as Commerce Customization Action in the Commerce Customization Editor. Promotions are, just like search profiles, defined and configured at the backoffice. If you would like to read more about configuring promotions, this blog might interest you.
I hope this gave a bit of insight in how use the personalization mode in SmartEdit. For now, best wishes for 2021! Stay safe and healthy and let’s make it: “the one we kept innovating”!
Receive our weekly blog by email?
Subscribe here:


One response to “Personalization in SmartEdit”
Good Article ….