
Corina Claassen - van der Wijst
Read all my blogsAuthorizations in SAP Cloud for Customer… some might find it boring, but that does not make it less important.
There are several options to define what a user is allowed to see and to do in the system. Make sure you give this the right attention from the start of your project and think carefully about what you want to achieve. Under-restricting comes with the risk of for instance data leaks, over-restricting comes with the risk of an unusable system.
But where to start? First you need to define what kind of business roles you require. Once you have listed all the roles, you should think about what activities they should be able to execute. Should there be restrictions on some roles? What are they allowed to see and do?
Business Roles
Once it is clear what roles are required and what rights they should have, you can set them up in the system. The business role is the basis to start with. Each user in the system should be assigned to a business role, otherwise they cannot do anything.
Business roles can be found under Administrator > General Settings > Users > Business Roles.
On the business role you define which workcenter(s) the role should have – for instance, accounts, service and activities. This can be done in the Work Center and View Assignments part.

Instead of adding the complete workcenter, it is also possible to only add the relevant workcenter views. For instance, for workcenter Service, the role might not require the social media messages, but it should be able to use the Live Activity Center and Tickets. In the column on the right ‘Assigned to Business Role’ you can select and deselect the relevant workcenter views.
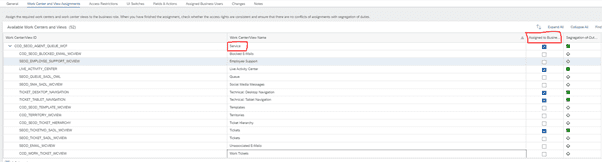
Remember, if a workcenter (view) is not added to the role, the user will not have access to it.
Next step is to define the access restrictions, this can be done per workcenter view on tab Access Restrictions. Access restrictions can be set on ‘read access’ and ‘write access’. However, if the read access is restricted this will also apply for the write access.

Read access can be unrestricted or restricted; write access has the same options and additionally ‘no access’. When setting a restriction on either read or write, the system expects you to choose one of the predefined restriction rules. Each work center has its own pre-defined rules.
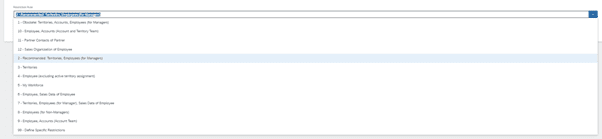
If the pre-defined rules are not sufficient, it is possible to choose rule ‘99’. But be careful using this rule, because when this rule is set SAP does not allow the business role to be transported to another environment.
And then there is tab Fields & Actions. In this section you can set fields – even extension fields – to read-only or hidden; and disable some activities.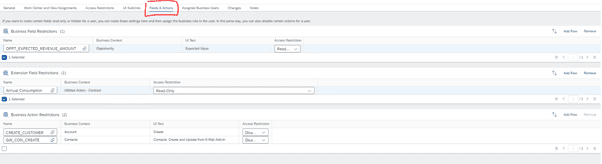
Page Layout
Not everything can be covered in the business role itself. For instance, if there is a specific field not everyone is allowed to see or to adjust. In this case you would need to create a page layout. Page layouts can be created in adaptation mode (user menu).
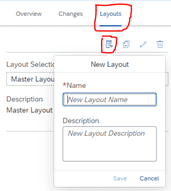
A page layout is based on the Master Layout, and a new one can be created by clicking on the ‘new’ symbol, enter a name / description and clicking on save. It is also possible to create a copy of an already created page layout. Remember, if a field is not present on the Master Layout it is automatically also not present in the custom page layouts.
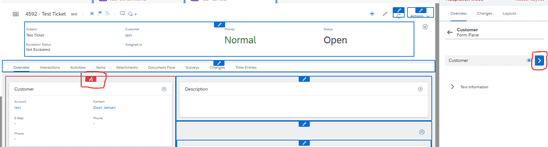
Once the new page layout is created, fields can be put to hidden or read-only by going to the workcenter view, for instance ‘Tickets’. Let’s say you want to hide field contact, click on the pencil in section ‘Customer’, and open in the right pane the customer section.
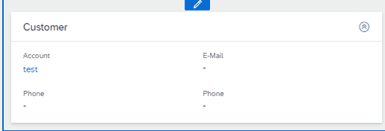
Open the field ‘contact’ and the options for this field appear.

If you want to hide it, uncheck the ‘set as visible’ box. The changes are effective and visible immediately, as you can see below.
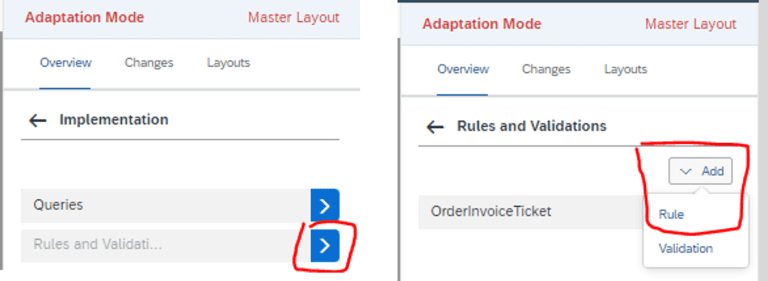
It is also possible to make fields only visible for specific roles. That can be done using a rule. A rule is set on a field on the Master Layout and is copied into the other page layouts. A rule is created in adaptation mode, by clicking on the arrow pointing to the left, until you see ‘Implementation’, enter ‘Implementation’.

In this section you can setup rules and validations, enter the section and click on ‘add’ and choose for ‘rule’.
In the pop-up you can set your rule. First enter a rule name, description is optional. Choose on the left the field which the rule should check against, for instance a service category. The rule below can be set on a field which should be only visible for employees in the role of ‘Marketing Manager’ or ‘Partner Manager’ and when the ticket is of categorie ‘HT-EM’, which in this case concerns complaints, on an employee.
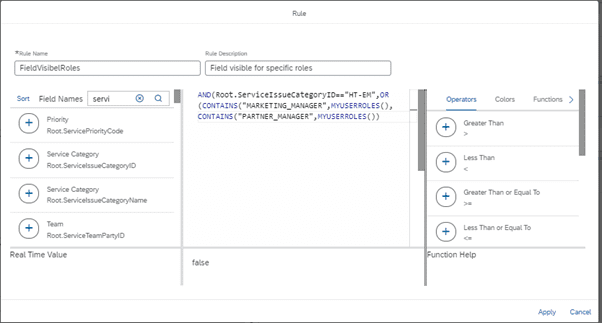
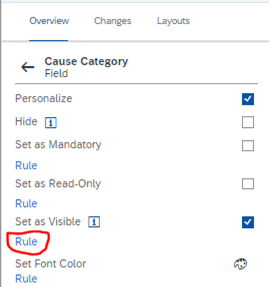
The rule is this case is ‘false’, as the user who created this rule does not have either one of these roles. Once you click on ‘apply’ the rule is saved and can be set on a field. In this case, the rule should be set on the visibility of the field. Therefore, click on ‘rule’ under the ‘set as visible’. Similar can be done for making a field mandatory for specific ticket categories for instance or make this field read-only for specific roles for instance.
A pop-up appears and here you can select the rule just created and click on ‘apply’.

You see that the field has now a rule defined.

There are a whole lot more things possible with page layouts, but that requires an additional blog.
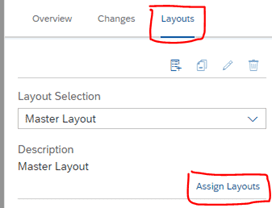
Once the new layout is finished, it needs to be assigned to a business role. For that go back to the layouts section and click on ‘assign layouts’.
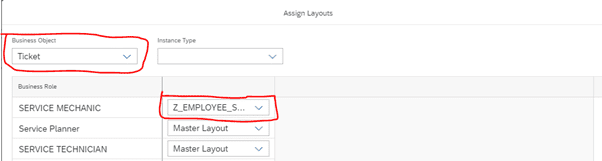
A pop-up appears. As we have made adjustments on the ticket, we want to assign these changes to a role. Choose for business object ‘Ticket’ and add the layout to the role.
Other options to restrict access are via company settings (via user profile), code list restrictions or via ‘organize work centers and work center views’.
If you have any questions regarding the above or if you would like to know more on setting up authorizations, do not hesitate to contact us!
Receive our weekly blog by email?
Subscribe here:

